Thursday, December 31, 2009

Best Kitchen Faucet for 2009 | Pilar Touch by Delta

Delta has had quite a year with their pursuit of going green campaign with water conservation technology.  Our favorite this year is their Pilar Touch Kitchen Faucet with H20 Technology.  Making it easier to turn the water on and off while your hands are full with other things around the kitchen,  is a great idea when it comes to water conservation.  Most people working or cooking in the kitchen would probably turn off the water in the sink much more often if they could do it with out having to put their hands on it.


Its a decision everyone has made before.  Should I clean off my hands so I can turn off the faucet or just turn it off and then clean my hands as well as the faucet too.  While it doesn't take too long to do either task, most of us don't think twice about it.  Well I think if people had the choice of that split second decision, they would chose to turn off the kitchen faucet.  Well with the Pilar Touch, we can now test that theory.

We hope to carry the Pilar Touch at TheKitcheFaucet.com in 2010, but for now you can find many discount kitchen faucets on our website.

Wednesday, December 30, 2009

Installing the new Bathroom Faucet

Ok. Now its on to the most rewarding part of this segment.  Installing our brand new awesome, beautiful bathroom faucet.  Well it might be that glamorous, but after all the hard work, it might feel that way.  First we clean up the area where our new bathroom faucet will go and make sure our new faucet will fit in the sink with the same amount of holes in the sink as are required for our chosen faucet.

You might want to follow the instructions that came with your new faucet for this step, but I will supply some pointers to make it that much easier.  Your faucet like the drain assembly will most likely come with all the parts you need for it assembled on the faucet already.

Remove the big plastic nuts as they will need to be put back on from under the sink to hold the faucet in place.  Your new faucet will probably come with a plastic washer that surrounds the base of the faucet.  It is probably a good idea to put some silicon sealant or plumbers putty around the base of the faucet.  There are not many leaks than can occur here, but you don't want water getting under the sink through the holes made for the faucet.  Insert the faucet into the sink.  You should be able to leave the faucet laying there while you go back under the sink unless it is very top heavy, but if not you might need some extra hands to hold it in place while you put on the plastic nuts under the sink.

Tighten the plastic nuts under the sink.  You should probably only tighten these by hand unless your instructions say different.  There is no need to make this too tight.


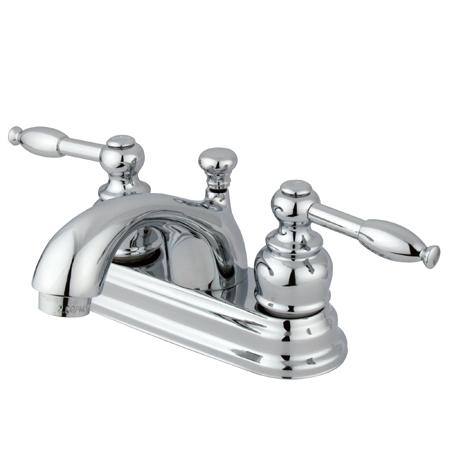
Next connect the plastic water hoses under the sink to the copper piping on the new faucet.  You might run into a little problem here.  Your plastic hoses might not reach your new faucet, but don't fret.  You can buy these hoses at any local hardware store.  They look like the picture over to the right.

Tighten the metal nuts from water hoses onto the copper pipes on the faucet.  These need to have a fairly tight seal because there will be constant water pressure going through these hoses once you turn the water back on.  One thing to note here is that you should not bend (increase resistance) on the plastic water hoses any more than is required.  For instance, cut the plastic hoses to the proper length rather than bending them to fit to the faucets copper pipes.  To much bending of these hoses could cause them to snap out of the copper pipe at the bottom where they connect to the water inlet valves, which will result in a lot of water on the bathroom floor.  This coincidently will result in a very expensive flood repair bill, if you happen to not be at home when they snap out.

Well that should just about do it.  I do have a couple of things to say about installing the drain plug so I will save the last post.  If you have any questions about this part of the installation, please ask in the form of a comment here.  Until next time, you can find a wide assortment of bathroom faucets on our website at TheKitchenFaucet.com

Tuesday, December 29, 2009

Removing the Old Bathroom Faucet

Now that we are finally done with the drain and everything is working properly with no leaks, we can start installing the actual bathroom faucet.  The first thing we want to make sure we do is turn off the water flow valves under the sink.  Turn the valves clockwise until they won't turn anymore, and then test it by trying to turn the water on from the faucet.  If it no workie than we are good to go.


Installing a new faucet while the sink isn't installed yet in the bathroom is much easier than replacing one.  This is just because now we have to get under the sink like we are working under a car.  You will probably want to use a pillow under you because those cabinet corners will really hurt your back otherwise.  There is not to much to this step so if you do it right, you won't be under the sink long.

First you need to disconnect the sink hoses from the copper pipe of the bathroom faucet.  Most plumbers will use a pipe wrench here, but I find its better to use vice grips because you can lock them down to the nuts and free your hands to get up and do something like reading these instructions.  Look in two vice grips as shown in the picture.  Hold one vice grip and turn the other one clockwise.  This should loosen up the nuts.  As you can see in the picture, these might have been glued together because it never came loose.  I turned  it until it twisted the copper pipe until it snapped.  This is ok since this was the old bathroom faucet.

Let the loosened nut fall to the bottom of the sink hoses as we will need them later.  Now the last thing is to disconnect the faucet from the sink.  There should be two nuts clamping the faucet to the sink.  Normally these are directly below the hot and cold knobs.  Turn these clockwise and the faucet should come loose of the sink.

That should be it.  Remove the faucet and clean up the area to install your brand new bathroom faucet.  If you have any questions about this part, feel free to ask a question in the comments section.  Next we will install the  new bathroom faucet.  Until then take a look at our wide variety of bathroom faucets at TheKitchenFaucet.com.

Thursday, December 24, 2009

Installing the new Bathroom Faucet Drain Assembly | Part 2


Before we install the new drain assembly for our bathroom faucet, we want to apply a little silicone sealant to the area around the drain at the bottom of the sink.  This will greatly improve the tight seal we need around the drain hole so we don't get a leak.   Using the silicone sealant now in the project means we have a much smaller chance of finding leaks later in the project and will save a great deal of time loosening and tightening trying to stop the leaks later.

Now lets grab the new drain assembly and go to town.  Most modern bathroom faucet kits come with all the components screwed together on the right order so you can see what order the nuts and washers will go in.  Unscrew the parts of the drain assembly and pay close attention to their order.  Put the top part(drain plug) in over the top of the sink and then screw the flange pipe coming in from under the sink.  Make sure you have the large nut, then metal washer(if you have one), then the rubber washer on the flange pipe in that order before connecting it to the drain plug. You also want to make sure the J-Unit plastic nut first then washer are around the flange pipe also before putting the flange pipe down into the J-Unit.  It is a good idea to put some silicone sealant around the threads of both large nuts here. This will help ensure there are no leaks.

If you put everything on the flange pipe here correctly, all you should have to do know is tighten everything up and test the flowing water through the drain pipe.

If you have any questions about this process or are stuck, please feel free to post a comment and ask a question.  We are happy to help and take a look at our bathroom faucets and kitchen faucets to add to your home.

Next, we will start with the fun stuff.  Installing the actual bathroom faucet.

Tuesday, December 22, 2009

Getting Ready to Install the New Drain Assembly of your Bathroom Faucet


Once you have the drain unscrewed from the flange on your bathroom faucet drain, you can continue unscrewing the J-Pipe.  This is probably a good time to put the water bucket under the J-Pipe as there is a little water in there which might spill.  Next Loosen up the white plastic nut around the J-Pipe in order you can remove the flange.  These are fairly easy to loosen as they have nice grips to grab onto.  If you can’t get it lose, you can always use your old friend the Vice-Grip

Most of the time when your installing a bathroom faucet, the flange is down pretty far into the J-Pipe so you might have to loosen up some of the other plastic nuts further down the line to turn the J-Pipe down and sideways to remove the flange. This is shown in the picture above.  If you can do what is shown in the picture, you might be able to get the flange pipe out without dumping the water from the J-Unit Pipe.

Also, when removing the flange from the J-Unit, make sure you retain the plastic washer just under the giant plastic nut. This part goes with the J-Pipe and remember which way it is facing on the flange as you will need to put this on your new flange. 


Alright, you are finally finished with the worst part of installing your bathroom faucet.  Clean up the drain whole around the sink, grab you new flange from your new faucet set and we will start on the actual install of the drain assembly of your bathroom faucet.

In the mean time if you are interested in a bathroom faucet for your home, you can find some on our website at TheKitchenFaucet.com

Thursday, December 17, 2009


Step 1 - Removing the Drain Assembly from your Bathroom Faucet


First, you want to remove the drain plug so you can get your hands on the top part of the drain. If you can’t just pull your out, which is better if you like free flowing water, you will need to unscrew it from the back part of the flange. This is called the T-Connector. Once this is removed the drain plug will come right out.


Second, now that the drain plug is removed we can get our hands on the drain itself. You can begin to unscrew the giant nut around the flange with your pipe wrench (or vice grip) to loosen up the drain from the sink. If you are able to loosen up the giant nut to the bottom of the flanges threading kudos to you, but for most of us this is not the case. You might notice that after a couple of turns and nothing getting any looser, the only thing your turning is the drain on the top side of the sink. Luckily most drains come with holes in them so we can jam a big screw driver in there to keep it in place while we turn the wrench below.


Find a bathroom or kitchen faucet at TheKitchenFaucet.com


Tuesday, December 15, 2009

Installing a Bathroom Faucet | Introduction


A couple of tools you are going to need for this project are:

· Pipe Wrench

· Pillow(something soft to rest your back on)

· Vice Grips

· Big Screw Driver

· Water Bucket

There are actually two parts to installing a faucet which some people don’t realize until it is staring them in the face. Installing the actual faucet and we also have to install the new drain and flange shown here.


It doesn’t matter which part you tackle first, but personally I like to get the dirty work out of the way so I can enjoy the fun part later. So that is what we are going to do here. The professional way to remove this by using a Pipe Wrench to turn the bottom part of the drain, but most DIY’ers don’t need a pipe wrench on a daily basis. The Pipe Wrench can be easily substituted for a vice grip, which always comes in very handy for many projects. The Flange and drain are screwed together to create a firm grip around the actual porcelain sink. Grabbing a hold of the drain can be a little frustrating if you don’t know what your doing. Luckily you have me here to help.


Tomorrow we will start the steps for installing a new bathroom faucet. In the meantime, you can check out our wide variety of bathroom faucets at TheKitchenFaucet.com


Tuesday, November 24, 2009

Kingston Brass Bathroom Faucet | Lever Handles


This week at theKitchenFaucet.com we would like to review Kingston Brass' 4" Centerset Lavatory Faucet with the Polished Chrome Finish. This bathroom faucet is a great addition to make your bathrooms look fabulous. Whether you've moved into a new house and need some upgrades or you just want a nice new addition to that old style bathroom. This faucet will do the trick. Its got Knight Lever Style Handles with Brass Construction for long lasting durability. A lifetime premier finish which comes in Satin Nickel, Polished Chrome, or Oil-Rubbed Bronze. It fits a 4" Centerset sink and has a 2 gallon per minute flow rate.

Tuesday, November 10, 2009

New Delta Faucet Touch Technology


Our favorite faucet company, Delta Faucets, have paved the way yet again with a new technology they call Touch2O. This technology is not exactly new to the world we live in, but is new to the world of faucets.


The new touch sensitive faucet technology allows you to tap the faucet anywhere on the handle or spout and the water starts flowing. This comes in very handy when you have two full hands or your hands are covered in a slimy goo. I can't tell you how many times I have gone to wash my hands after preping meat for hamburgers and I have to use my wrist to turn on the water. Otherwise, use your hands to turn on the water knowing full well your gonna have to wash off the faucet too, because your all slimy. No more. With this new technology, we can get back using the kitchen faucet without getting it dirty, also.


You can learn all about this new technology on Delta's website. We are also very excited to be caring these faucets for purchase in the near future at our website, TheKitchenFaucet.com.


Happy cooking!

Tuesday, October 27, 2009

Installing the New Flange

This weekend my wife and I were doing some clean up and repairs around the house and one thing we needed to fix was the basket at the bottom of the kitchen sink. Our old basket was broken in half and seeing as there was almost no possible way to fix it, we had to go out and get a new one :) I guess I could have used some super glue and jerry rigged it back together, but that wouldn't be any fun so we MUST PURCHASE NEW STUFF. Much more fun, right?

So in order to remove your old flange, your going to probably need a couple of pipe wrenches to get around the drain. One to hold the top part and one for the bottom. Another problem you might run into would be holding the the top part of the drain in place with a big screw driver or something. There is a tool used to do this, but normally the two pipe wrenches should do the job.

If your looking up at the sink from underneath, turn the lower piece holding the drain pipe up clockwise until it comes loose. That will remove the drain from the lower pipe drain. Now for the top one. It's pretty easy, just make sure the top of the sink drain isn't moving while you turn the giant nut underneath to get it off.

Before you go ripping it out from under the sink, make a note of where the different pieces are when taking it apart. Believe me, it will save you probably an hour of undoing the new again because you put something on upside down.

We hope this helps with your quest of a clean sink. If you ever need a kitchen faucet, bathroom faucet, or shower head, check out our shop at TheKitchenFaucet.com

Tuesday, October 20, 2009

Remodeling the Master Bath


This past weekend, my Wife and I decided we wanted to remodel our master bathroom. We painted the walls a nice green color. I "very carefully" replaced the light switch recepticals. I think that was one of the cheapest ways to make a room look new and fresh. You can get nice white light switches for about $.69 at Home Depot, and the cover plates are even cheaper.


The next big conversion is going to be what? You guessed it. Our bathroom faucet. I think this nice satin nickel center faucet from theKitchenFaucet.com will look very nice in our new bathroom. As soon as I have installed the faucet myself, I will post instructions on how to get one of these installed yourself. Not that I don't already know how to install it :), I just want to make sure I get it right and make some documentation before I dive into a posting.

Tuesday, October 13, 2009

Delta Faucets company is going Green

Recently, one of my favorite manufacturers of kitchen and bathroom faucets has released a new model of faucet that has gone over to the green side of things. Delta has started building there faucets with water conservation and maximizing water efficiency in mind.


The Delta Company is working with the EPA to offer what they call WaterSense. Basically they are making their faucets that operate at 1.5 gallons per minute instead of the standard which is 2.2 gallons per minute. We at TheKitchenFaucet.com love any company who has committed themselves to help clean up the environment, and hopefully we will be caring their product soon. You can read more about Delta's new campaign on there website.

Tuesday, September 29, 2009

How it all got started with Kitchen faucets

I first starting learning more about faucets when I became the person in the house hold who alwasy was doing the dishes. I hated seeing the dishes in the sink all the time and thought this could be a good way for me to contribute to my family. I also have to admit that I enjoy doing the dishes sometimes. It has a kind of pieceful busy work to it. Almost like mowing the lawn.

Being the first post for this topic, I thought I would introduce theKitchenFaucet.com This web site will be selling kitchen faucets, bathroom faucets, and everyone's favorite, shower heads. Though shower heads are not our exclusive product, people seem to like them so we are going to sell them.

We will also be talking on this blog(web log) about how to install kitchen and bathroom faucets for yourself and also many ways to improve the efficiency of your water usage and even how to improve energy costs. Yea, your asking yourself how are you going to help me improve energy usage through my faucets?? Well there are ways. I guess you will have to bookmark this blog so when the time comes to unvale the big secret. You won't be left in the dark. Ya'll have a good week now. Until next time